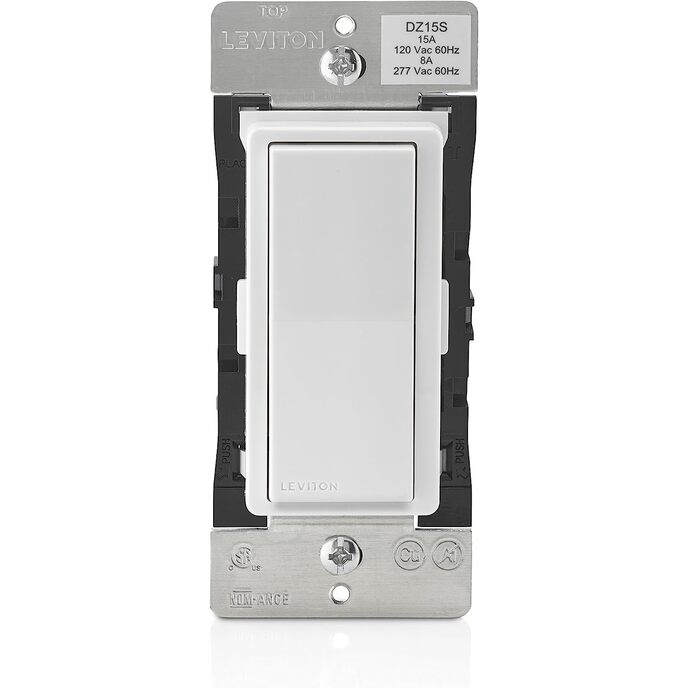
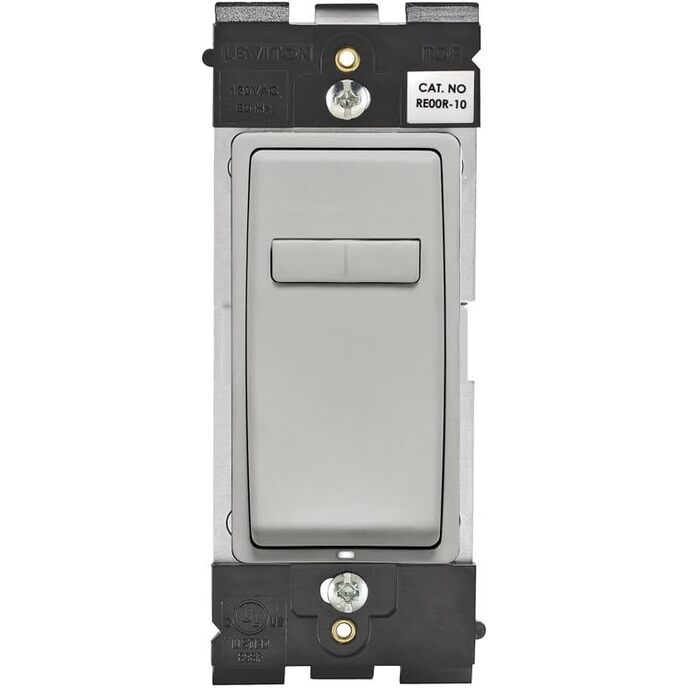
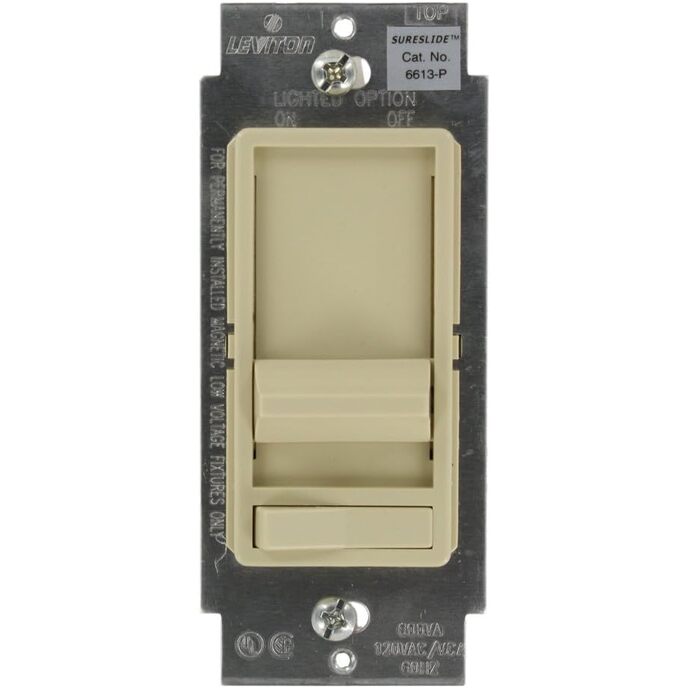
This works great, once I got it properly installed. However, that took 3 days and about 7 phone calls to Leviton support. That's mostly because I was doing a 3-way installation where one box has the load and line and the other box only has a 3-wire bundle (this is called a dead-end box). The instructions only cover a 3-way where one box has the load and the other box has the line. The diagram in the instructions also cost me hours of head-scratching- I'm not an electrician, so maybe it's my fault, but hopefully you can learn from my experience. Here are some tips and detailed instructions, based on my electrical setup. Maybe I can save you some time and frustration. 1. Put the connections in under the terminal plates. For some reason, their online video shows the method of wrapping each connection around the terminal screw. But getting the wires wrapped tightly was not always easy, and making changes was time consuming. Just stick the flat wire in under the plate and be done with it! 2. If, like me, you are not an electrician, use the wiring diagram for the single pole application for your dimmer and ignore the diagram for the dimmer in the 3-way. If you are looking at the front of your switch, you will see that your line black (hot/from power) goes to the black screw on the right top. The neutral (white) goes to the silver screw on the left top. And the load black (to the lights) goes to the red screw on the left bottom. If you compare the two wiring diagrams, you'll see that the position of the YL/RED terminal appears to switch from the right to the left side of the switch. I thought this had something to do with the way the 3-way circuit worked. It doesn't. It has to do with some technical writer who wanted to draw a straight line from YL/RD to YL/RD. The customer support agent who finally helped me realize this critical mistake chastised me for not looking at the labels of each terminal. These labels are on a sticker on the back of the box, however, so if you've connected your ground, it's really difficult to see the back of the box. 3. If you are installing a 3-way, make sure you get the DD00R-DLZ remote. DO NOT GET THE DD0SR. One Amazon page has a chart that says the SR is compatible. It is definitely not. 4. If you call customer support, realize not all agents are equally capable of helping you. One agent told me it was impossible to install this switch in a 3-way dead end setup. Luckily, I had already talked with 2 other agents who said it was possible, so I corrected him. He also said that I could leave out the line neutral, because it was unnecessary. Guess what? The line (power/from circuit breaker) neutral is absolutely necessary to complete the circuit. 5. In a 3-way dead-end setup, here's how you will have to connect the two switches. First, make sure you have a 3-wire bundle running between the two switches (this actually means 4 wires including the ground). Mine are black, white, and red, so I will refer to them using those colors, but as long as you have three wires and a ground, you're good to go. On the top right (Black terminal), I have the black line (power/ hot) under one side of the clamp and the Black Traveler that goes to box 2 under the other side of the clamp. Two wires- one terminal. Below that terminal, on the bottom right, I have the Red Traveler that goes to box 2 under the clamp of a silver screw (this is the YL/RD terminal). On the bottom left, on the red screw (RD terminal), I have the black load (goes to my lights). For the final terminal, on the top left (the WH terminal), I had to use a wire nut to clamp together the White/ Neutral line (from the power) with the White/ Neutral Traveler that goes to Box 2 AND a pigtail (a short piece of wire). The pigtail is then connected under one side of the WH clamp and the White/Neutral Load (goes to lights) is under the other side of the WH clamp. Two wires- one terminal. One agent told me I could pigtail all 4 wires together, but it was easier to just connect 2 wires to the terminal. 6. The other box was easy peasy, once I had Box 1 straightened out. The Black Traveler goes to top right BK terminal, the Red Traveler to the bottom right YL/RD terminal, and the White/ Neutral goes to the top left WH terminal.