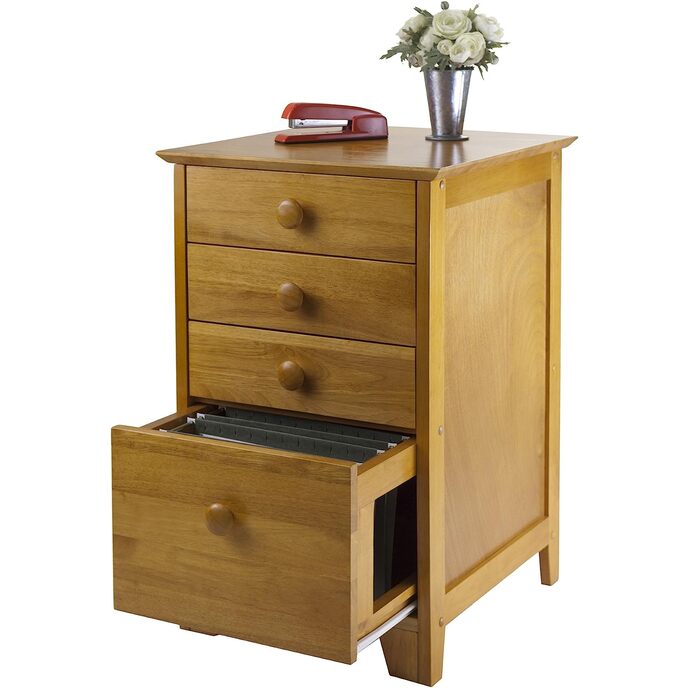
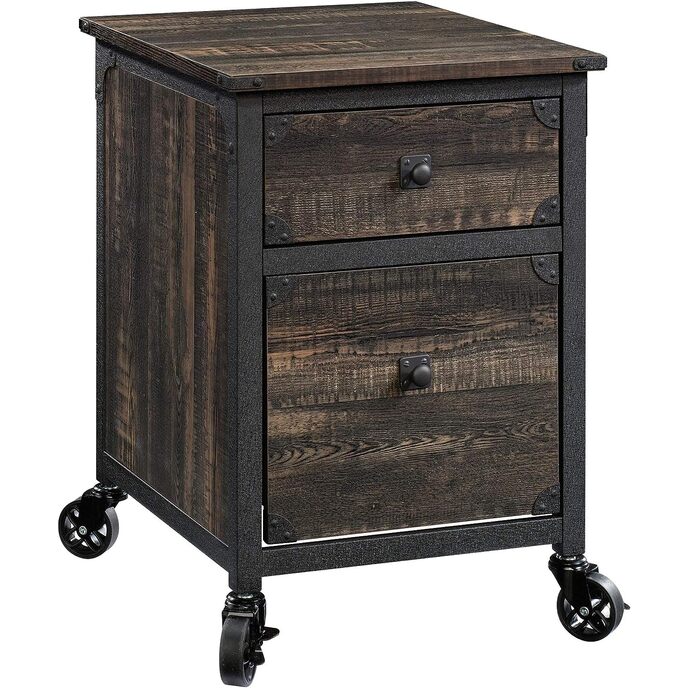
PROS > Excellent materials > Very sturdy--makes a good solid printer stand, PERFECT for my new Epson 4020 printer. > Very attractive > File drawer has suspension rails/tracks. Therefore opens and closes easily even with a heavy load of files. But it's NOT a double (full) suspension track, so access to the last 2" of files is not easy if you have the drawer tightly packed with files. > Well packed QUALITY CONTROL ISSUES > I noticed many small flaws in the wood, and woodwork when assembling, but few were noticeable when assembled. > The fit of the components is less than perfect, but this is mostly unnoticeable in the assembled printer stand. Alignment and tightness can be greatly improved by judicious use of a mallet during assembly (see "Assembly" below). > In mine the holes were not drilled for one of the drawer sides. I'm an experienced wood-worker, so drilling the holes were no problem for me. > In mine, the components were short one screw, but it was a common size, easy to find in my workshop. > In mine, the right side of the file drawer is lower than the left side. Repair would require moving the right drawer track up 1/16". (see "Easy Fix" below) FLAWS In mine, and apparently others, the file drawer easily comes off the track. This is because the printer stand frame is too wide on the bottom. You could sand the sides of the bottom panel 1/16" to 1/8". I simply shimmed out the track with thin strips of cardboard, which works fine. DESIGN ISSUES > File drawer has no bottom, and so cannot be used for other purposes > For perfectionist the drawers should be assembled with pegs and glue (at a minimum) rather than small wood screws (but you don't get that option unless you have a woodshop). For ordinary folks, you have to be very careful not to strip the holes by overtightening the screws. If you do, see "Easy Fix" below. TOOLS > An allen wrench is provided. However you also need a small phillips screwdriver, a small hard hammer, and mallet (a large soft hammer). > A power screwdriver makes the job easier but: >> You'd need a 1/8" (allen) hex bit that fits your power screwdriver. >> It is easy to overtighten the small screws (used for the drawers)--which strips the holes. If you use your power screwdriver, just set the screws loosely, and hand-tighten with a manual screwdriver. > Rely on a soft mallet to close gaps rather than tightening the screws tighter--otherwise you'll just strip the holes. Loosely assemble with the screws, smack with the mallet where necessary, then re-tighten the screws. ASSEMBLY > The shipping box is designed to open completely flat. Open it up on the floor to use as a mat to protect the printer stand during assembly. Assembly is fairly easy for anyone with experience with "assemble-yourself" furniture, but not IKEA simplicity. > A big soft mallet (rubber hammer) can come in handy to align components and make the joints tighter when necessary. (It is best to protect the surface with a 1 x 4 x 12" scrap board, etc which you actually whack). > The drawers assemble with simple screws, meaning that there is some "give". You may need to push or pull to align parts while tightening the screws. DO NOT overtighten. > There are 12 filler pegs to cover large screw holes on the sides. These should be lightly hammered in place, but use a piece of scrap wood, cardboard, etc. between the pegs and the hammer so that you don't mare the finish. > If you want the drawers to slide more smoothly, the traditional remedy is a wax candle. Simply slide a wax candle back and forth in the groove in the side of the drawer to coat it with wax. There are also commercial products available for this purpose. For exampleSlideez Lubricant orElmer's E450 Slide-All Dry Spray Lubricant 4-Ounce orNylo-Tape 10 mil thick x 1/2'' x 10 feet > You may be tempted to glue the floating back panel or the floating drawer bottoms for extra strength. Beware that, in theory, these are floating for a reason---to be able to respond to expansion and shrinkage caused by temperature and humidity, rather than joints cracking under the strain. In reality, whether or not floating panels are necessary depends on the type of wood, how it is finished, and the climate. I suspect that in most cases the primary purpose of floating panels in modern furniture is to simply assembly. In my former ignorance, I routinely glued floating panels in place---and have never seen any problem as a result. The small drawers are the only components of the cabinet which might benefit from gluing. I did NOT glue the drawer joints (nor floating bottoms) of the small drawers of the printer stand, but in my opinion doing so "can't hurt". EASY FIX for stripped or mis-aligned holes > If you strip a screw hole, the easiest "fix" (other than finding a larger screw), is to jam a sliver of wood in the hole (e.g., a toothpick). If you want, a little white glue on the sliver is even better.Elmer's Craft Bond Wood Craft Glue, 4-Ounce, White The white glue will also be absorbed into the wood and make it stronger. I often fill such holes with white glue, wait for it to be absorbed, then refill the hole, etc. If course, you need to set the screw before the glue dries. > This is also the easiest way to slightly move a misaligned hole. Fill the hole completely with a plug of wood (hammered-in if necessary, liquid white glue lubricates hammering plugs in). Bamboo skewers (used for cooking) make great mini-plugs. Then drill a new hole at the edge of the old hole. With small woodscrews, you may not have to drill a new hole--just install the screw on the edge of the old hole, but a shallow starter hole made by with a tool for this purpose, or small nail, is recommended to be sure the screw digs in where you want it to. > Click on “Stoney” just below the product title to see my other reviews, or leave a comment to ask a question.